Tag: Podman

DevOps and the Möbius Loop

Harnessing the Möbius Loop for a Revolutionary DevOps Process

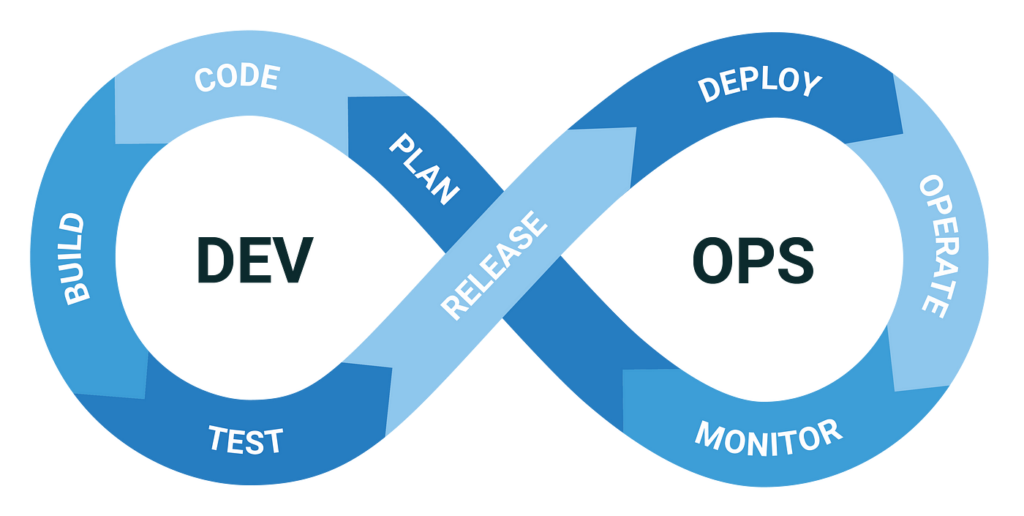
In the world of DevOps, continual improvement and iteration are the name of the game. The Möbius loop, with its one-sided, one-boundary surface, can serve as a vivid metaphor and blueprint for establishing a DevOps process that is both unified and infinitely adaptable. Let’s delve into the Möbius loop concept and see how it beautifully intertwines with the principles of DevOps.
Understanding the Möbius Loop

The Möbius loop or Möbius strip is a remarkable mathematical concept — a surface with only one side and one boundary created through a half-twist of a strip of paper that then has its ends joined. This one-sided surface represents a continuous, never-ending cycle, illustrating an ever-continuous pathway that can epitomize the unceasing cycle of development in DevOps.

Reference: Möbius Strip – Wikipedia

The Möbius Loop and DevOps: A Perfect Harmony

In the ecosystem of DevOps, the Möbius loop signifies a continuous cycle where one phase naturally transitions into the next, establishing a seamless feedback loop that fosters continuous growth and development. This philosophy lies at the heart of DevOps, promoting an environment of collaboration and iterative progress.

Reference: DevOps and Möbius Loop — A Journey to Continuous Improvement

Crafting a Möbius Loop-Foundation DevOps Process

Building a DevOps process based on the Möbius loop principle means initiating a workflow where each development phase fuels the next, constituting a feedback loop that constantly evolves. Here is a step-by-step guide to create this iterative and robust system:

1. Define Objectives

  • Business Objectives: Set clear business goals and metrics.
  • User Objectives: Align the goals with user expectations.

2. Identify Outcomes

  • Expected Outcomes: Envision the desired outcomes for business and users.
  • Metrics: Design metrics to measure the effectiveness of strategies.

3. Discovery and Framing

  • Research: Invest time in understanding user preferences and pain points.
  • Hypothesis: Develop hypotheses to meet business and user objectives.

4. Develop and Deliver

  • Build: Employ agile methodologies to build solutions incrementally.
  • Deploy: Use CI/CD pipelines for continuous deployment.

Reference: Utilizing Agile Methodologies in DevOps

5. Operate and Observe

  • Monitor: Utilize monitoring tools to collect data on system performance.
  • Feedback Loop: Establish channels to receive user feedback.

6. Learning and Iteration

  • Analyze: Scrutinize data and feedback from the operate and observe phase.
  • Learn: Adapt based on the insights acquired and enhance the solution.

7. Feedback and Adjust

  • Feedback: Facilitate feedback from all stakeholders.
  • Adjust: Revise goals, metrics, or the solution based on the feedback received.

8. Loop Back

  • Iterative Process: Reiterate the process, informed by the learning from previous cycles.
  • Continuous Improvement: Encourage a mindset of perpetual growth and improvement.

Tools to Embark on Your Möbius Loop Journey

Leveraging advanced tools and technologies is vital to facilitate this Möbius loop-founded DevOps process. Incorporate the following tools to set a strong foundation:

  • Version Control: Git for source code management.
  • CI/CD: Jenkins, Gitlab, or ArgoCD for automating deployment.
  • Containerization and Orchestration: Podman and Kubernetes to handle the orchestration of containers.
  • Monitoring and Logging: Tools like Prometheus for real-time monitoring.
  • Collaboration Tools: Slack or Rocket.Chat to foster communication and collaboration.

Reference: Top Tools for DevOps

Conclusion

Embracing the Möbius loop in DevOps unveils a path to continuous improvement, aligning with the inherent nature of the development-operations ecosystem. It not only represents a physical manifestation of the infinite loop of innovation but also fosters a system that is robust, adaptable, and user-centric. As you craft your DevOps process rooted in the Möbius loop principle, remember that you are promoting a culture characterized by unending evolution and growth, bringing closer to your objectives with each cycle.

Feel inspired to set your Möbius loop DevOps process in motion? Share your thoughts and experiences in the comments below!

Running OpenAI in Kubernetes

Using the OpenAI API with Python is a powerful way to incorporate state-of-the-art natural language processing capabilities into your applications. This blog post provides a step-by-step walk through for creating an OpenAPI account, obtaining an API key, and creating a program to perform queries using the OpenAI API. Additionally, an example demonstrating how to create a podman image to run the code on Kubernetes is provided.

Creating an OpenAI Account and API Key

Before building the code, create an OpenAI account and obtain an API key. Follow these steps:

  1. Go to the OpenAI website.
  2. Click on the “Sign up for free” button in the top right corner of the page.
  3. Fill out the registration form and click “Create Account”.
  4. Once an account has been created, go to the OpenAI API page.
  5. Click on the “Get API Key” button.
  6. Follow the prompts to obtain a API key.

Installing Required Packages

To use the OpenAI API with Python, install the OpenAI package. Open a command prompt or terminal and run the following command:

pip install openai

Using the OpenAI API with Python

With the OpenAI account and API key, as well as the required packages installed, write a simple Python program. In this example, create a program that generates a list of 10 potential article titles based on a given prompt.

First, let’s import the OpenAI package and set our API key:

import openai
openai.api_key = "YOUR_API_KEY_HERE"

Next, define the prompt:

prompt = "10 potential article titles based on a given prompt"

Now use the OpenAI API to generate the list of article titles:

response = openai.Completion.create(
    engine="text-davinci-002",
    prompt=prompt,
    max_tokens=50,
    n=10,
    stop=None,
    temperature=0.5,
)
titles = [choice.text for choice in response.choices]

Let’s break this down:

  • engine="text-davinci-002" specifies which OpenAI model to use. This example uses the “Davinci” model, which is the most capable and general-purpose model currently available.
  • prompt=prompt sets the prompt to our defined variable.
  • max_tokens=50 limits the number of tokens (words) in each generated title to 50.
  • n=10 specifies that we want to generate 10 potential article titles.
  • stop=None specifies that we don’t want to include any stop sequences that would cause the generated text to end prematurely.
  • temperature=0.5 controls the randomness of the generated text. A lower temperature will result in more conservative and predictable output, while a higher temperature will result in more diverse and surprising output.

The response variable contains the API response, which includes a list of choices. Each choice represents a generated title. This will extract the generated titles from the choices list and store them in a separate titles list.

Finally, print out the generated titles:

for i, title in enumerate(titles):
    print(f"{i+1}. {title}")

This will output something like:

  1. 10 Potential Article Titles Based on a Given Prompt
  2. The Top 10 Articles You Should Read Based on This Prompt
  3. How to Come Up with 10 Potential Article Titles in Minutes
  4. The Ultimate List of 10 Article Titles Based on Any Prompt
  5. 10 Articles That Will Change Your Perspective on This Topic
  6. How to Use This Prompt to Write 10 Articles Your Audience Will Love
  7. 10 Headlines That Will Instantly Hook Your Readers
  8. The 10 Most Compelling Article Titles You Can Write Based on This Prompt
  9. 10 Article Titles That Will Make You Stand Out from the Crowd
  10. The 10 Best Article Titles You Can Write Based on This Prompt

And that’s it! You’ve successfully used the OpenAI API to generate a list of potential article titles based on a given prompt.

Creating a Podman Image to Run on Kubernetes

To run the program on Kubernetes, create a podman image containing the necessary dependencies and the Python program. Here are the steps to create the image:

  1. Create a new file called Dockerfile in a working directory.
  2. Add the following code to the Dockerfile:
FROM python:3.8-slim-buster
RUN pip install openai
WORKDIR /app
COPY your_program.py .
CMD ["python", "your_program.py"]

This file tells Docker to use the official Python 3.8 image as the base, install the openai package, set the working directory to /app, copy your Python program into the container, and run the program when the container starts.

To build the image:

  1. Open a terminal or command prompt and navigate to a working directory.
  2. Build the image by running the following command:
podman build -t your_image_name . 

Replace “image_name” with the name for the image.

To run the image:

podman run image_name

This will start a new container using the image created and subsequently run the program created above.

Verify the image runs and spits out what the desired output. Run it on a Kubernetes cluster as a simple pod. There are two ways to accomplish this in Kubernetes, declaratively or imperatively.

Imperative

The imperative way is quite simple:

kubectl run my-pod --image=my-image

This command will create a pod with the name “my-pod" and the image “my-image".

Declarative

The declarative way of creating a Kubernetes pod involves creating a YAML file that describes the desired state of the pod and using the kubectl apply command to apply the configuration to the cluster.

apiVersion: v1
kind: Pod
metadata:
  name: my-pod
spec:
  containers:
    - name: my-container
      image: my-image

Save it as “my-pod.yaml”

Outside of automation running this on the Kubernetes cluster from the command line can be accomplished with:

kubectl apply -f my-pod.yaml

This command will create a pod with the name “my-pod" and the image “my-image". The -f option specifies the path to the YAML file containing the pod configuration.

Obviously this is quite simple and there’s plenty of ways to accomplish running this code in Kubernetes as a deployment or replicaset or some other method.

Congratulations! Using the OpenAI API with Python and creating a podman image to run a program on Kubernetes is quite straightforward. With these tools available. Incorporating the power of natural language processing into your applications is both straightforward and very powerful.

Simplify using Podman instead of Docker

At this point most everyone using containers know of Docker, but is Docker right for your workload? Maybe not. If you plan on using Kubernetes to run your “cloud native” workloads, then it may be worthwhile to use a tool which was designed to run Kubernetes workloads originally. Another reason would be Podman is daemonless, whereas docker wants to control everything docker. Podman does not need root access to run containers. One final reason is Docker is a “one-stop” shop where Podman is modular. You install and use what you need with Podman like buildah to build images. Podman ends up being lighter weight and leaves the heavy lifting to other tools while maintaining OCI compliance and being more secure overall.

Ok so you are now convinced to move into the growing mainstream using Podman. Since you’ve been running Docker for a while you realized that you can add yourself to the docker group and all is good. It’s not so easy with Podman which is a REALLY good thing and makes Podman more secure. Let’s talk about about the why and we’ll get to the how momentarily.

Podman works a little different than Docker (shocker). Podman uses a subordinate system which is assigned to the user at runtime. With that being said, Podman would end up using more UIDs and SUBUIDs than Docker (docker uses the existing system for it’s UIDs). This means we need to “pre-assign” a block for Podman to use and we probably need to increase the defaults to support those additional UIDs and SUBUIDs.

Installing Podman is quite simple. Podman is available for most OS’s and architectures. For SUSE Linux, simply ‘zypper in podman’ will install it. You will want to also add slirp4netns using ‘zypper in slirp4netns’ (you may need to add the container module using ‘SUSEConnect -p sle-module-containers/15.4/x86_64’ replacing 15.4 with your SLE version and x86_64 with your architecture).

With Podman installed we now need to grant the user we want to run Podman with a block of SUBUIDs and SUBGIDs which may be outside what is normally used. Let’s use 200000-265536. Run the command:

sudo usermod –add-subuids 200000-265536 –add-subgids 200000-265536 $USER

Where $USER is “your user” or the user you want to run Podman commands (remember we’re avoiding sudo or root here).

Now you need to add more namespaces since the user may not have enough by default. Check the number available.

Use sysctl –all –pattern user_namespaces and if it is the default of 1000 you will want to increase that number.

Use sudo nano /etc/sysctl.d/userns.conf

Add user.max_user_namespaces=28633 to bump the available namespaces

Use sudo sysctl -p /etc/sysctl.d/userns.conf to load the new setting

And use sysctl –all –pattern user_namespaces to verify what you added.

Now it will be necessary to configure user networking. To do this we need to enable slirp4netns (it was installed earlier). To enable all of the default settings, reboot your node.

That’s it! A little more involved than using docker without sudo by adding your user to the docker group, but you are now using a more modern and secure tool for managing your containers!

New to DevOps? Start here…

New to the devops scene? Want to get started with a career supporting application operations, managing Kubernetes, running docker, or just browsing around. This site is going to be designed to provide some interesting anecdotes, entertaining articles, and how-tos for getting started with a career in the field of “devops”.

Ah yes…what is this “devops”. Everyone has an opinion for sure. Some call it a “paradigm“. That word has negative connotations though. Some actually feel it is a “engineering position”. Ok. Acceptable. Others just call it what it is…an operator who supports the development efforts of an enterprise. Dev-Ops. No matter, the idea here is to provide info for every opinion.

Want to know more about a topic whether it is Kubernetes, Application Development, Devops, or other enterprise datacenter topic? Speak up. Comments are welcome.

Next up…Getting Started in DevOps